Brother VX 1400 - Anleitung

Brother VX 1400 – Anleitung, kostenlos online im PDF-Format lesen. Wir hoffen, dass dies Ihnen hilft, etwaige Fragen zu klären. Wenn Sie noch Fragen haben, kontaktieren Sie uns bitte über das Kontaktformular.


Inhalt:
- Seite 4 – INDICE; ÍNDICE
- Seite 5 – HAUPTBESTANDTEILE; BELANGRIJKSTE
- Seite 7 – ZUBEHÖR; TOEBEHOREN
- Seite 8 – Connecting Plugs; FONCTIONNEMENT DE LA; Raccordement; BEDIENUNG IHRER; Kabelanschlüsse; GEBRUIK VAN DE; Stekkers en contacten
- Seite 10 – Inserting the Needle; Pour mettre l’aiguille en place; Nadel einsetzen; Checking the Needle; Nadel prüfen; De naald erin doen; De naald controleren
- Seite 11 – Changing the Presser Foot; Nähfuß wechseln; De persvoet vervangen
- Seite 12 – Converting to Free-Arm Style; Modèle bras libre; Umbau auf Freiarm; Omschakelen naar vrije armmachine; Steadying the Machine; Nivellierung der Maschine; De machine stabiliseren
- Seite 13 – VARIOUS CONTROLS; Pattern Selection Dial; DESCRIPTIF DES DIFFERENTES; VERSCHIEDENE REGLER; Stichmuster-Drehschalter; BEDIENINGSTOETSEN; Patroonkeuzeknop
- Seite 16 – FADENFÜHRUNG; Aufspulen; DRAAD INRIJGEN; De spoel opwinden
- Seite 17 – Unterfadenführung; De onderdraad aanbrengen
- Seite 20 – Drawing Up Lower Thread; Remontée du fil inférieur; Heraufholen des Unterfadens; Oppakken van de onderdraad
- Seite 21 – Couture avec l’aiguille jumelée; Nähen mit zwei Nadeln; Naaien met een dubbele naald
- Seite 25 – OVERZICHT VAN MATERIALEN, NAALDEN EN GARENS
- Seite 28 – Zigzag Stitching; Points zigzag; Zickzackstich; Zigzagsteek
- Seite 30 – Elastic Stitching; Point élastique; Elastischer Zickzack; Elastische steek
- Seite 31 – Shell Tuck Stitching; Point picot; Dessousstich
- Seite 32 – Making a Buttonhole; Création d’une boutonnière; Knopfloch nähen; Een knoopsgat maken
- Seite 36 – Buttonhole Fine Adjustment; Equilibrage des boutonnières; Afstelling voor knoopsgaten
- Seite 37 – Button Sewing; Pour coudre un bouton; Knöpfe annähen; Knopen aanzetten
- Seite 38 – Einnähen eines Reißverschlusses; Een rits inzetten
- Seite 39 – Gathering; Pour froncer un tissu; Reffen; Plooien
- Seite 41 – Appliques; Applizieren; Applicaties
- Seite 42 – Monogramming and Embroidering; Monogrammes et broderies; Monogramme und Stickarbeiten; Monogrammen en borduren
- Seite 45 – Ölen; Smeren; Nettoyage; Cleaning
- Seite 46 – Reinigung; Reiniging
- Seite 47 – Performance Checklist; Checkliste; Controlelijst
- Seite 51 – Maschine verpacken; De machine opnieuw inpakken; IMPORTANT; WICHTIG
®
OPERATION MANUAL
MANUEL D’UTILISATION
BEDIENUNGSANLEITUNG
INSTRUCTIEHANDLEIDING
OPERATION MANUAL
MANUEL D’UTILISATION
BEDIENUNGSANLEITUNG
INSTRUCTIEHANDLEIDING
„Anleitung wird geladen“ bedeutet, dass Sie warten müssen, bis die Datei vollständig geladen ist und Sie sie online lesen können. Einige Anleitungen sind sehr groß, und die Zeit, bis sie angezeigt wird, hängt von Ihrer Internetgeschwindigkeit ab.
War diese Anleitung hilfreich?
Über diese Anleitung
- Marke
- Brother
- Modell
- VX 1400
- Dokumenttyp
- Anleitung
- Sprache(n)
- Deutsch, Englisch, Französisch, Dutch
- Seiten
- 53
- Dateigröße
- 803,8 KB
- Format
Weitere Anleitungen für Brother VX 1400
Zusammenfassung
7 ○○○○○○○○○○○○○○○○○○○○○○○○○○○○○○○○○○○○○○○○○○○○○○○ ○○○○○○○○○○○○○○○○○○○○○○○○○○○○○○○○○○○○○○○○○○○○○○○○○○ INDICE Seite HAUPTBESTANDTEILE ............................................................ 1 ZUBEHÖR ............................................................................... 3 BEDIENUNG IHRER...
○○○○○○○○○○○○○○○○○○○○○○○○○○○○○○○○○○○○○○○○○○○○○○○ ○○○○○○○○○○○○○○○○○○○○○○○○○○○○○○○○○○○○○○○○○○○○○○○○○○ 1 PRINCIPAL PARTS 1 3 4 5 6 2 L O H I J K M N P 7 1 8 9 0 A B C E F D G * The illustrations of the sewing machine on the following pages maydiffer slightly from your machine. PIECES PRINCIPALES * Les i...
○○○○○○○○○○○○○○○○○○○○○○○○○○○○○○○○○○○○○○○○○○○○○○○ ○○○○○○○○○○○○○○○○○○○○○○○○○○○○○○○○○○○○○○○○○○○○○○○○○○ 3 ACCESSORIES 1 Buttonhole foot (1 pc.) 2 Zipper foot (1 pc.) 3 Button sewing Foot (1 pc.) 4 Needle pack (regular single needle No. 14) (3 pcs.) 5 Twin needle (1 pc.) 6 Bobbins (3 pcs.) 7 Darning plate...
Frage stellen
Ähnliche Anleitungen
Weitere Brother Andere Modelle
 Brother PED-BASIC Anleitung
 Brother PT-55 Bedienungsanleitung
 Brother PT-310 Bedienungsanleitung
 Brother SE-270D Anleitung
 Brother se270d Anleitung
 Brother STAR 230E Anleitung
 Brother X14 Bedienungsanleitung
 Brother 1 Anleitung
 Brother 750E Anleitung
 Brother DCP-195C Bedienungsanleitung
 Brother DCP115C Bedienungsanleitung
 Brother Embroidering Machine Bedienungsanleitung
 Brother HE-240 Anleitung
 Brother HL-L2340DW Bedienungsanleitung
 Brother HL-L2360DN Bedienungsanleitung
 Brother JS23 Bedienungsanleitung
 Brother MFC-795CW Bedienungsanleitung
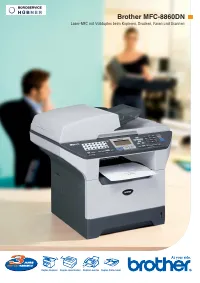 Brother MFC-8860DN Bedienungsanleitung
 Brother MFC-L2720DW Bedienungsanleitung
 Brother P-touch 1750 Bedienungsanleitung